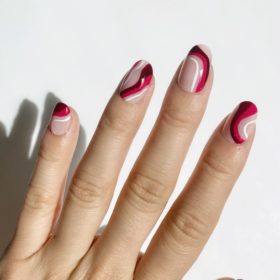
If you can’t squeeze in an appointment at your fave nail bar before the holidays, no need to panic. You can still show up and show out at your upcoming shindigs thanks to this super easy DIY holiday nail look whipped up by Rita Remark, Essie’s lead nail artist and global educator. Abstract, painterly nail looks have been popping up on our Insta feeds all year, which is ideal, since it just so happens to be a foolproof method for those that don’t exactly have pro nail artist on their CV.
Step 1: Ace of base

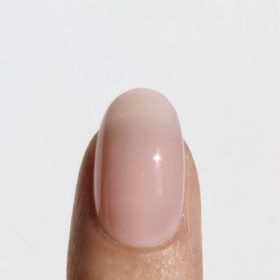
To increase long wear and protect your nail bed, apply two coats of your favourite base coat, followed by a neutral coat of polish. If your skin has neutral or cool undertones, go with a creamy or pinky shade. If you’re warm, try beige.
Step 2: Winning streaks

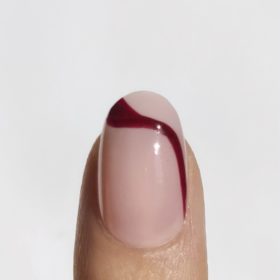
Once your neutral shade has dried, carefully brush on a berry red in wavy lines across each nail. (If you have the time and patience, you can dump a little polish onto some tin foil and use a small art brush to get extra precise lines.) Paint one or two lines on each nail and take your time. Don’t fret if it takes one or two nails to get in the groove. This is an easy holiday nail look to remove so it’s no big deal if you need to start over with one or two nails.
Step 3: Coordinate colours

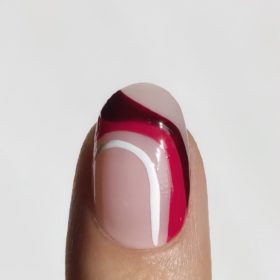
Once the berry shade has dried, repeat step two with a brighter red hue and white polish and paint so each stroke is side-by-side. Feel free to experiment with the colours of your choice — other fun options could include metallics or a green-on-green palette.
Step 4: Go the distance

Since chips are not on this holiday menu, protect your handiwork with a longwear top coat and reapply daily. A moisturizing serum or nail oil will also go a long way in making your cuticles and hands look like they were groomed by a professional.
The post Snag this Easy Holiday Nail Look Courtesy of Essie’s Rita Remark appeared first on FASHION Magazine.
